
 |
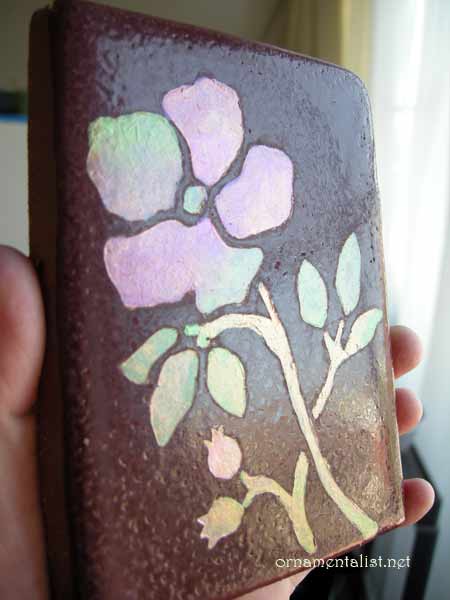
| faux mosaic glass tile painted by Lynne Rutter |
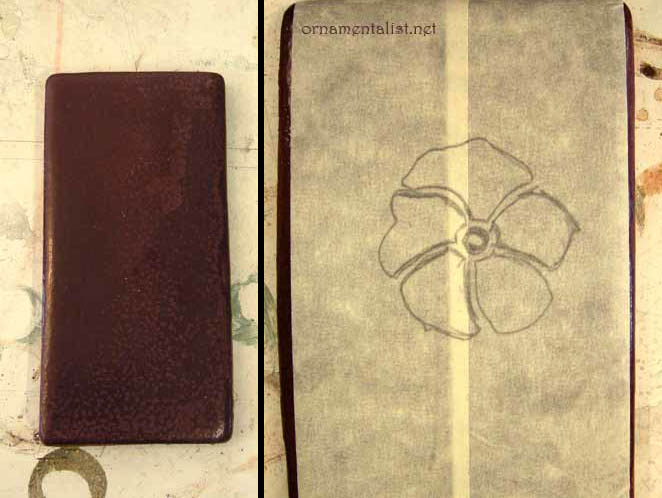 |
| masking tape "stencil" |
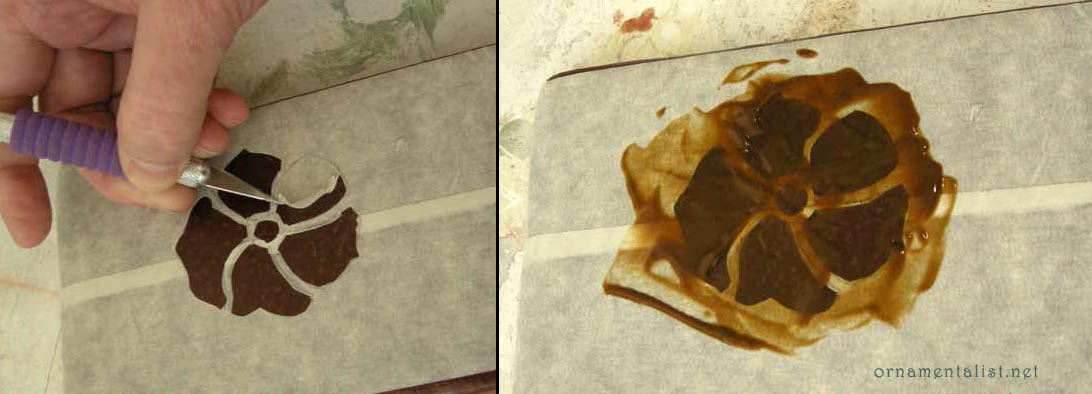 |
| cutting out the tape stencil and etching the design |
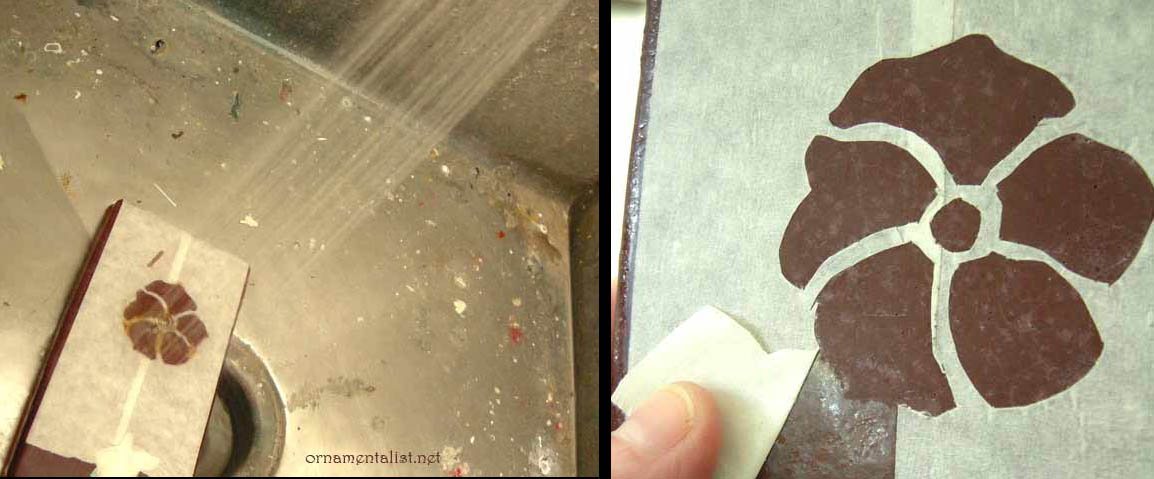 |
| rinse off the Etch-All thoroughly, allow tile to dry overnight |
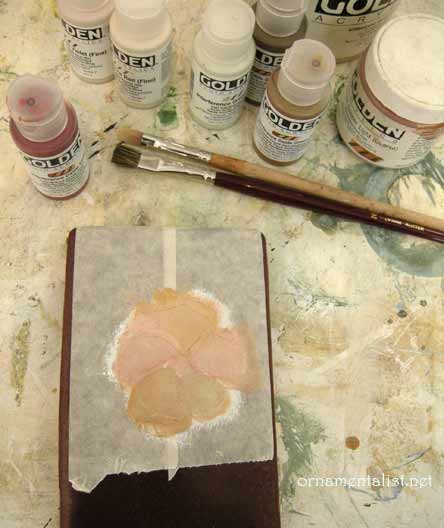 |
| first layers of paint |
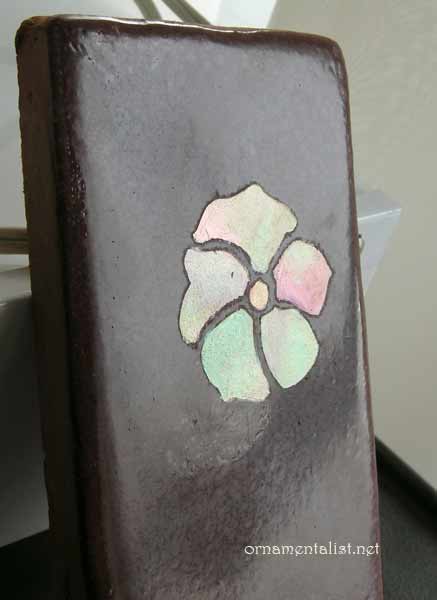 |
| finished sample |
It's hard to get good coverage with such transparent colors, so many layers are needed and you have to be careful not to let brushstrokes build up.
To get that volcanic glass look, I apply the interference colors in a bit of rainbow- each "piece" has several colors changing from red to green to oxide, etc
When the sample was finished, as you can see if you look very closely, the tape bled a bit during the etching process. So in the next round I used a solvent-resistant masking film from an auto-body shop.
Because the tiles are dark it was a challenge to transfer the design onto a clear film. I ended up transferring the design to the tile with bright red saral paper, then sticking the mask on them, and then cutting the design out. This whole process took only about 1 hour.
Following the steps above, the tiles were then etched.
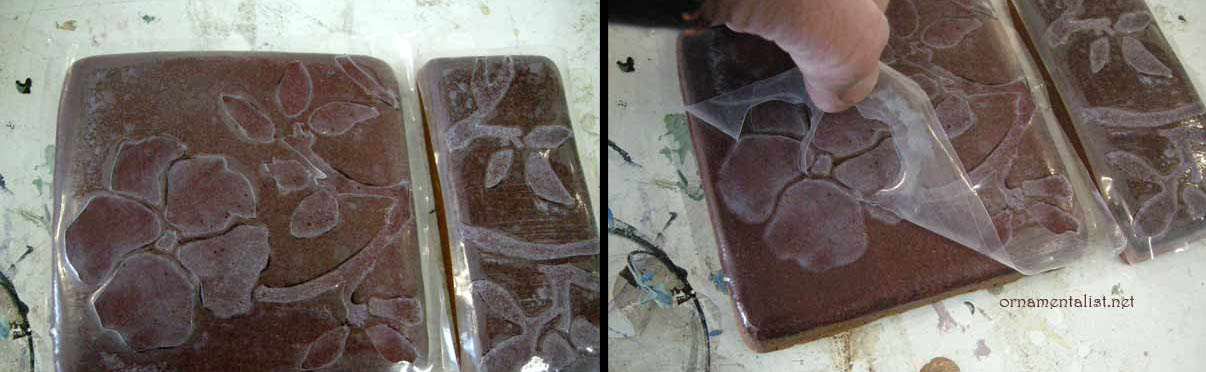 |
| project using hand-cut solvent-resistant film |
As the tiles are not flat and the glaze has a lot of bubbles and texture, getting the masking film to stick perfectly was not possible. But on a smooth flat machine made tile, this would work like a dream. One bonus about this film- once the water dries off it, it can be re-adhered.
Now for the fun part!
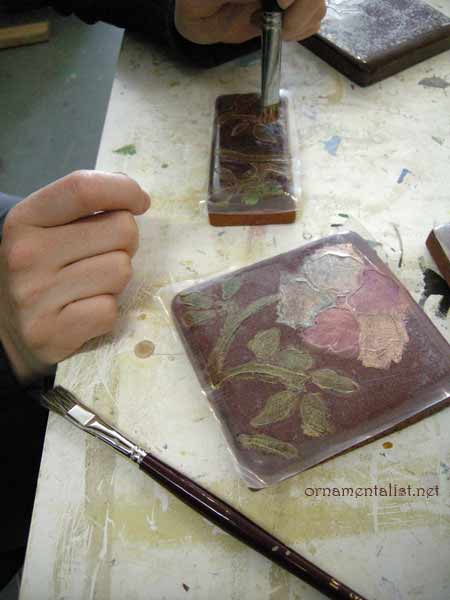 |
| Here is Melka, painting the design with interference colors |
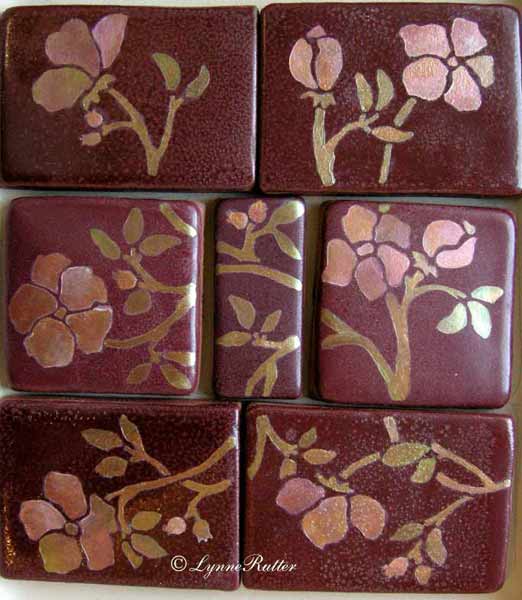 |
| the finished project! |
A finished set of tiles: pretty, water-resistant, and unique.
This process can also be used for tiles that are already installed.
Lynne! You are like a mad scientist mad for beauty! I can almost see you striding about, muttering formulas to yourself, trying out this and that until you came up with the right look and system.
ReplyDeleteThe tiles are so lovely, and you got the look just right. Congrats.
Jennifer
oh you know it. The whole studio is a laboratory!
DeleteWonderful for tiles design and various color presents news watch for really wonderful. I have like this site.
ReplyDeletePutting arts for mosaic tiles, that’s impressive and very creative.
ReplyDeletebathroom tiles
I love your blog. This is a cool site and I wanted to post a little note to tell you, good job! Best wishes!!! mosaic tile
ReplyDeletethanks so much for visiting. I am glad you enjoyed this!
DeleteJust searching for ideas for my mom's birthday this weekend and so glad I came across this.
ReplyDeleteI have a ton of tiles in the garage that would make for an excellent project.
I'm thinking a bit of a twist though and making a mosaic jewelery box. Thanks for the great idea!